







How to Decorate Cookies With Printed Edible Images | CakeSupplyShop
 How to Decorate Cookies With Printed Edible Images
Want to create beautiful, personalized cookies without spending hours piping complicated designs? Printed edible images make cookie decorating easier, faster, and more creative.
Whether you’re preparing birthday cookies, wedding favors, baby shower treats, or holiday desserts, edible images allow you to add colorful designs, photographs, names, and themed decorations directly to your cookies.
With the right supplies and a few simple techniques, even beginners can create professional-looking decorated cookies.
In this guide, you’ll learn how to decorate cookies with printed edible images, choose the best icing, and create beautiful custom cookies for any occasion.
What Are Printed Edible Images?
Printed edible images are food-safe designs printed with edible ink onto specially designed edible sheets.
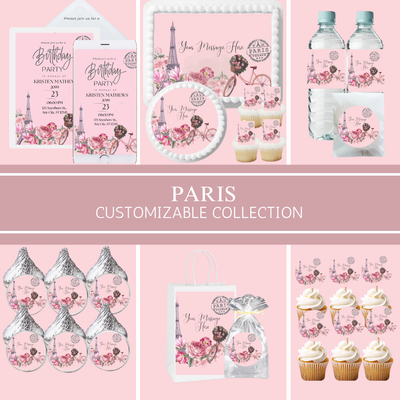
These sheets can feature photographs, birthday messages, flowers, cartoon-style designs, sports themes, and personalized decorations.
Once applied to a suitable cookie surface, they create a smooth, colorful decorative finish without requiring advanced piping skills.
Supplies You’ll Need
Before decorating your cookies, gather these essential supplies:
- Freshly baked and completely cooled sugar cookies
- Printed edible images or edible cookie toppers
- Royal icing or suitable cookie glaze
- Food-safe scissors or an edible image cutter
- Small food-safe brush
- Piping bags
- Offset spatula or icing smoother
- Airtight storage containers
Decorating Tip: Choose cookies with flat surfaces so the edible images sit evenly.
Step 1: Bake and Cool Your Cookies
Start with your favorite sugar cookie recipe.
Roll the dough evenly and cut it into circles, squares, hearts, or other shapes that match your edible image designs.
Bake according to your recipe and allow the cookies to cool completely before decorating.
Expert Tip: Round cookies are especially easy to decorate with printed edible images because they provide a consistent surface.
Step 2: Prepare a Smooth Icing Base
A smooth icing surface helps edible images adhere neatly.
Royal icing is a popular choice because it creates a firm, even base.
Outline each cookie with royal icing, then fill the center with flood icing.
Allow the icing to dry completely before applying your edible images.
Expert Tip: White icing is ideal for printed edible images because it helps preserve the brightness of the printed colors.
Step 3: Cut Your Printed Edible Images
Carefully cut each edible image to match the shape and size of your cookies.
If you’re using pre-cut edible cookie toppers, check that they fit before applying them.
Handle edible sheets with clean, dry hands to prevent tearing or moisture damage.
Expert Tip: Leave a small icing border around each image for a polished appearance.
Step 4: Apply the Edible Images
Follow the application instructions supplied with your edible image product.
For suitable royal icing surfaces, apply a very thin layer of an approved edible adhesive or lightly moisten the surface if the product instructions recommend it.
Carefully position the image on the cookie and smooth it gently from the center outward.
Avoid excess liquid, which can cause colors to bleed or the image to wrinkle.
Expert Tip: Work with one cookie at a time to maintain control over placement.
Step 5: Add Decorative Borders
Once your edible image is securely attached, add finishing touches.
Popular cookie border ideas include:
- White royal icing dots
- Pink or blue piped borders
- Small edible sugar pearls
- Miniature edible flowers
- Coordinating sprinkles
Expert Tip: Match the border color to the printed image for a coordinated design.
Step 6: Allow Cookies to Set
Let the decorated cookies rest in a clean, dry area according to the edible image and icing instructions.
Avoid touching the printed surface while it is setting.
Once the decorations are stable, package the cookies carefully.
10 Creative Cookie Decorating Ideas Using Edible Images
1. Personalized Birthday Photo Cookies
Turn favorite photographs into edible cookie decorations for birthdays and milestone celebrations.
2. Baby Shower Cookies
Create adorable cookies featuring baby animals, teddy bears, clouds, or pastel designs.
3. Wedding Favor Cookies
Decorate elegant cookies with floral patterns, initials, or personalized wedding messages.
4. Sports Birthday Cookies
Use soccer balls, basketballs, footballs, or racing designs for sports-themed celebrations.
5. Princess Birthday Cookies
Create magical cookies featuring crowns, castles, butterflies, and pastel colors.
6. Graduation Cookies
Add graduation caps, school colors, names, and congratulatory messages.
7. Holiday Cookies
Decorate cookies with Christmas trees, snowflakes, Halloween designs, or Easter patterns.
8. Corporate Logo Cookies
Add edible company logos to cookies for business events, grand openings, and promotional celebrations.
9. Anniversary Cookies
Create personalized cookies featuring photographs, romantic designs, and anniversary dates.
10. Coordinated Cake and Cookie Displays
Match your edible cookie images with cake wraps and cupcake decorations for a beautifully coordinated dessert table.
Expert Tips for Perfect Edible Image Cookies
Choose the right cookie shape: Flat, evenly baked cookies make image placement easier.
Use smooth icing: Avoid bumps and uneven surfaces that may distort the printed design.
Prevent excess moisture: Too much water can cause printed colors to run.
Handle images carefully: Edible sheets can be delicate, especially when exposed to humidity.
Match your decorations: Coordinate icing borders and sprinkles with the edible image colors.
Store properly: Follow the image supplier’s instructions and protect decorated cookies from heat, humidity, and condensation.
Test before large orders: Decorate one sample cookie first to confirm the icing and edible image work well together.
With these simple techniques, you can create attractive personalized cookies for almost any celebration.
Frequently Asked Questions
Can edible images be applied directly to cookies?
They work best on a suitable smooth icing or edible adhesive layer. Always follow the product’s application instructions.
What icing is best for edible image cookies?
Royal icing is a popular choice because it provides a smooth, firm surface.
Can I use edible images on store-bought cookies?
Yes, provided the cookies have an appropriate surface or you add a suitable icing layer.
How do I prevent edible images from wrinkling?
Use minimal moisture, apply images carefully, and smooth them gently.
Can printed edible images be personalized?
Yes! Many edible image products can feature photographs, names, logos, and custom designs.
Recommended CakeSupplyShop.com Products
These product pages were verified on CakeSupplyShop.com.
1. Personalized Photo & Custom Text Edible Images
Choose the option with twelve 2-inch images on an 8 × 10-inch sheet for personalized cookie decorating.
2. Hello Kitty Edible Cupcake and Cookie Image Toppers
Perfect for themed birthday cookies and matching cupcake displays.
3. Rainbow 21st Birthday Edible Cookie Toppers — 12 Count
Create colorful milestone birthday cookies with 2-inch round edible images.
4. Rainbow 30th Birthday Edible Cookie Toppers — 12 Count
Ideal for personalized 30th birthday cookie favors and dessert tables.
5. Greek Key Edible Cookie Image Toppers — 12 Count
A classic geometric design for elegant celebrations and coordinated desserts.
Create Beautiful Personalized Cookies With CakeSupplyShop.com!
Learning how to decorate cookies with printed edible images is a simple way to make impressive desserts for birthdays, weddings, baby showers, and special events.
With printed edible images, smooth royal icing, and a few finishing touches, you can create professional-looking cookies without complicated decorating techniques.
Shop edible images and cookie decorations:
CakeSupplyShop.com — Turn Every Cookie Into a Sweet Memory!


Leave a comment